There have been many changes in barrier design since this blog was written. People who want to have a soundproof door need to know how to soundproof a door. We have updated the process and explanations for this barrier technology on 04/06/22
Door Soundproofing
If you want to have a soundproof door there are some important considerations you need to think about. A door like a window can be a portal for noise or unwanted sound to enter our room. Acoustic doors have to perform a dual function. They must provide a barrier between the inside of the room and the outside noise levels. They also must keep sound energy generated from within the room from leaving the room and entering other adjacent rooms. They must do this on a temporary basis because they must open and close to allow for individual access into and out of the room. As they open and close continually, they must seal correctly, so that no gap exists between the door edges and especially the door bottom. Let’s look at how to soundproof a door.
Vibration Transmission: https://en.wikipedia.org/wiki/Vibration_isolation

There Is No Substitute For Mass
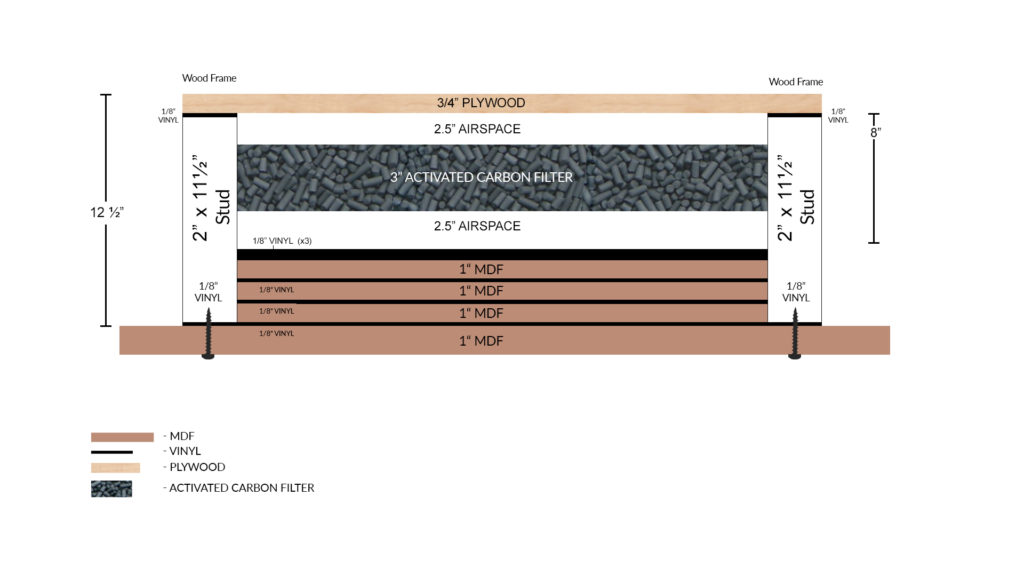
Our soundproof door is barrier technology. Barrier technology must have mass. Multiple layers of materials arranged in vibration-reducing manners are the goal. The type of material, the way the materials are assembled and how much of a certain material to use is based upon frequency and amplitude. Multiple density fiberboard (MDF) is a good material that provides us with the mass we need to begin our door construction. Remember from past discussions, that not only do we need mass in our material selection but we need to have different materials with different densities, so we can slow down vibrations coming through our door. Vibrations will lose energy if they have to struggle through different material types with different densities. If we use MDF, we can mate it with plywood. Plywood has numerous layers that are fitted together into a single piece of material. Now we have two different materials that provide us with the appropriate densities. This is an example of how to arrange different materials with different densities.
Room Is A Boat: Soundproof Interior Doors
Doors and windows are the weakest links in any room. Doors lack the same density as the walls in which they are attached to. Windows lack the density of the walls they are built into. Sound is like water, it will find the weakest link in the structure and pass through that weak area. In a room, those two weak areas are the doors and windows. When you build or treat your room it is best to think of your room as a boat that you will place in water. Every opening no matter how small will be realized. Water like sound will find any opening to go through. Your room must be sealed with no openings of any type.
Barrier Technology Definition: https://en.wikipedia.org/wiki/Noise_barrier
Proper Assembly Required
We need to take our MDF and plywood and then assemble these two materials in a manner that reduces vibrations. Sound produces and is produced by vibrations. When electromechanical sound from our loudspeakers is produced and strikes our door surface, it is turned into vibrational energy. This mechanical vibrational energy sets the surface it strikes into motion. When it strikes our door, our door must be made in a manner that allows for this to occur but reduces the vibrations through the way it is assembled. To reduce these vibrations, we use a process termed constrained layer mass damping to sandwich our chosen materials together. To understand this principle, think of a truck off-ramp on a freeway in the mountains. If a truck loses its brakes going down a steep grade in the mountains, there are ramps to pull off the road and drive up the ramp. The ramp is at a 45-degree angle uphill. The goal with the ramp is to drain energy from the truck with no brakes. The goal is to slow its forward momentum and get the massive vehicle stopped before it strikes the water or sand piles at the end of the ramp.
Constrained Layer Mass Damping
Constrained layer mass damping is a process where we take different material types with different densities and arrange them in a manner that keeps vibration reduction in mind. We sandwich each material together with another material such as an acoustical glue. The more materials the vibration has to go through, the better for its reduction. With our MDF, plywood, and now glue, we have three materials that vibrations must go through. The more the better to a point. The materials we use and the manner in which we arrange them is based upon the frequency and amplitude of the noise created within the room or the noise from outside the room from coming inside the room. You must measure the noise in order to qualify and quantify the frequencies and amplitudes of the noise. Every frequency and amplitude of the noise is related to the material type, amount, and position of that material in the door barrier design.
MDF / Plywood
If we place MDF as the outside of our door surface, we then can add our plywood underneath the MDF. To secure the two materials together, we need to glue them together. We use a glue that will keep both materials together and provide another material type with a different density that our unwanted vibrations must go through. If we use MDF on the other side of the plywood we should use an MDF piece that is a thicker or not as thick piece as the front piece. The goal of this approach is for the vibrational energy to have to vibrate through many different material types of many different densities. We want to vary the density or mass of the piece and the thickness of the material to further “confuse” the vibration or slow it down just like our off-ramp example for trucks that lose their brakes.

Measure, Measure, Measure
Any structure that you use in your room must address a particular frequency or amplitude of energy. Lower frequencies require different barrier technology than middle and high frequencies. Without knowing what the frequency and amplitude of the noise are, you are just guessing in your door or wall build. Guessing with noise is a fool’s game. You will guess wrong. The problem with guessing wrong is that you will have to tear the structure out and start over after the proper frequency and amplitude measurements have been taken. This is a waste of time and money. Most people do not do this and then must live with the mistake they have made. This is not a good process especially in rooms where you are generating an income within.
How To Hinge Doors That Block Sound
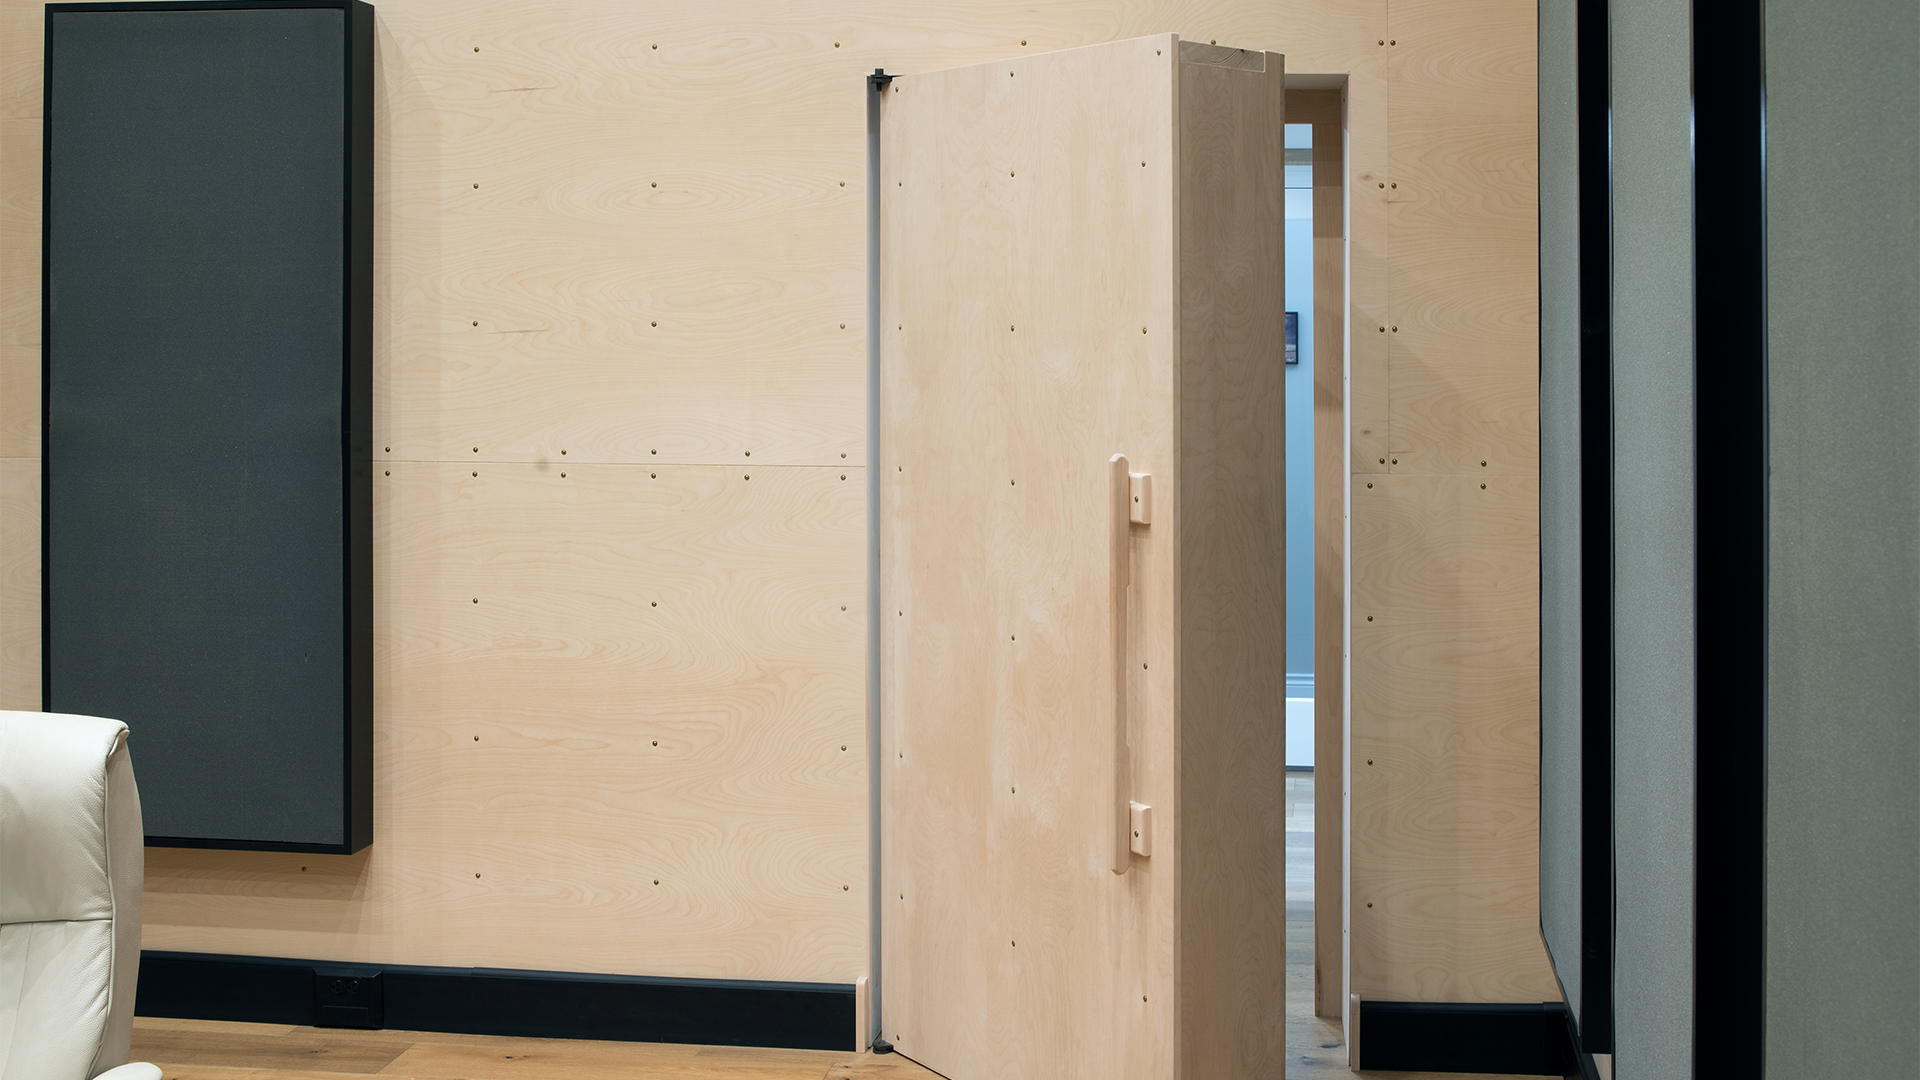
Once we have our door assembled with its associated weight, we will need to place it into the door frame. If it is an existing door frame, we must make sure it can support our new acoustic door’s weight and then seal correctly around all door edge surfaces. We may want to consider building a new door frame to support our new door. If we do not and choose to keep our existing frame, we must be sure it is sealed to the existing room structure with a healthy application of a proper sealing system. The frame must also be designed to support the additional weight of the door.
Sound Seal All Gaps
Finally, we must seal our new door to the door frame. All door edges must close squarely and seal properly. Special attention must be paid to the bottom of the door. This is an area where there is a lot of wear and tear and providing a continual seal every time is a must. We can use a brush type sealing strip that collapses when the door is opened or closed but then springs back into place to provide a good seal. There are numerous sealing strips available. Care must be taken to choose the correct stripping that matches the use of the door and the acoustical objective. The best methodology we have found is to have each piece of the door overlap each other and come into contact with each other. At this point of contact, a sealant material is inserted so that each door surface seals completely with each surface area.
In Summary
I hope this explanation helped. Please leave any comments below so I can get back to you. And if you want to learn more about this subject please sign up for our free room acoustic treatment videos and ebook which provide step by step instructions. Get instant access by signing up now.
Thanks


Thank you Mike for the great info there.
Dear Mike, thank you for all your advise. Could you maybe advise on where ceiling strip can be obtained.
Your reply would be appreciated!
Hi Don, Sorry for the delay. Here is web site: http://www.cavitysliders.com
It should be Medium Density Fibreboard (because there are other densities), not Multiple Density
Hi Richard, Thank you for the correction.
Thank you for your article. it is very informative. I have a furnace behind the door which makes a lot of noise like a truck. Is it safe to soundproof this particular door as you described?
K, What is the frequency and amplitude of the noise you are trying to reduce the transmission of?
I am actually planning to soundproof a room in my home, and I learned a lot from this article.Thanks!