Time Tested And Proven Technology
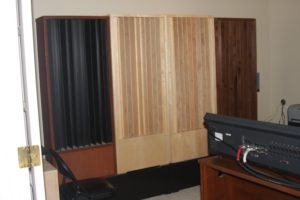
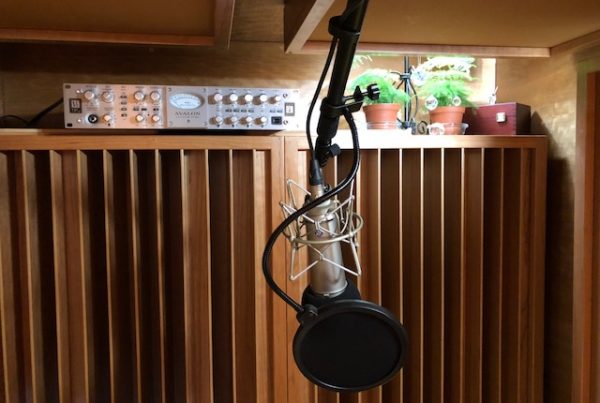
Professional studios have used quadratic diffusion for years. It is a time tested and proven diffusion technology and can provide diffusion in both horizontal and vertical dimensions. Quadratic diffusors are a series of wells or troughs that have different depths and widths. Each series of wells has a different depth based on on a complicated transaction using a prime number as a starting point. Each well width also comes into the equation.
Prime Number Base
Each prime number: 7, 11, 13, 17, etc. has a certain frequency range that it covers. The higher the prime number, the bigger distance between the low and high end frequency coverage of the diffusor and the larger and deeper the diffusor. Most quadratic diffusors start around 200 Hz.- 300 Hz. and go up to 3,000 Hz. Each well width is based on half wavelengths and each well depth is based on quarter wavelengths. The higher prime number diffusors fill in there diffusion frequency range with more frequencies covered using a higher prime number in the calculation thus producing more wells.
Versatile Technology
Quadratic diffusors can provide two out of a possible three dimensions of sound diffusion. A vertically positioned diffusor spreads sound out in a horizontal array. A horizontally positioned quadratic diffusor can spread sound out in a vertical array. Quadratic diffusors properly positioned can reduce unwanted reflections and spread that specular energy out into a smoother and more balanced sound field. Quadratic diffusors are commonplace on the rear walls of control rooms to minimize that slap back delay at the monitoring position. Both horizontal and vertical diffusors are used in this application. Use diffusors to interject “air” into your presentation and to make your sound larger.
Experience Built Into Plans
Quadratic diffusors are not difficult to build but it does take some trial and error to find the correct method to use. In Acoustic Field’s, DIY QD-11, we have taken all of that trial and error out of it for you. We have been building them for years and have made the mistakes for you. The build plans reflect years of experience and you if you follow each step by step process with the assembly instructions, you can build the same professional diffusor system the pros use in studio builds. Go check out our DIY Diffusers here.
Build Drawings And Assembly Instructions
The DIY kit includes actual build drawings that show all dimensions needed for each piece in the diffusor. Coupled with the build plans are in depth assembly instructions that have a special twist. Each step by step instruction comes with an actual build unit at that step of the process. The build drawing and assembly process tells you how to do it and the photos actually show you a real unit at that step being built. Each photo comes complete with text attached to each individual photo.
Assembly Photos, Material List, Cut Sheet, Tool List
Along with the actual build drawings and assembly instructions with photos, comes a material list which tells you what materials to consider in your own diffusor build. With the material list, comes a cut sheet that will tell you exactly how long and wide to make each piece. No need to wonder what tools will be required in the build, the tool list will tell you in detail what the tool requirements are. All you have to add is some time and a minimum wood working skill set.
Wood Or Paint?
You can build your quadratic diffusor out of wood. You can also build it out of wood related materials and paint the wood. There are advantages to both methods. If you use solid or veneered woods, you can stain the wood to compliment any existing decor. A solid wood construction will provide a diffusor that produces a warmer sound than a painted diffusor. A painted diffusor produces a warm sound but not as warm as wood but maybe an easier build for some individuals depending on individual skill sets.
Diffusor Positioning
Quadratic diffusors are used extensively on the rear wall of professional recording studios to reduce the slap back sound at the monitoring position. The sound bounce from the rear wall is time delayed and mixes with the direct sound to confuse the engineer. In a listening room, quadratic diffusion can be palced on both the rear wall and front walls. This dual wall diffusion application produces a sound field at the listening position that is full of air with separation between instruments and vocals. Greater separation produces more detail in each instrument and vocal.
Everything Included
The DIY kit for the QD-11 quadratic diffusor includes actual build drawings along with step by step assembly instructions which are illustrated through photos of an actual product build. Along with both of these comes a material list, cut sheet, and even a tool list, so you can decide if you have everything you need to build the diffusors. Now, you can build the same time tested and proven diffusion technology that professional studio builders use with the DIY – QD-11 units from Acoustic Fields. Go check them out here here and enjoy proper diffusion in your studio today.
Contact us with any questions at: info@acousticfields.com or call 520 – 392 – 9486 MST.
Thanks
Mike


