Boundary Room Reflections
Reflections from your room walls, ceiling, and floor will produce energy that moves around the room bouncing off every surface that it touches. These reflections impose themselves on the direct energy from your loudspeakers. The direct energy is the energy that travels in a straight line from your speakers to your listening or monitoring position. Reflections contain the sound of the room. The direct energy from your speakers is the purest form of energy that is translated from your speakers to your ears. It does not include the room sound. Near field listening is an attempt to minimize the room sound by moving us closer to the direct sound.
Reflection Times
When all of these reflections mix with the direct sound, they cause confusion that resides in the horizontal plane that extends from one side wall across the room to the other. In this horizontal plane that rises over our heads, is much information. The time signature of the reflections arriving at the listening or monitoring position has an impact on the sound we hear if the reflections do not arrive at a slower speed, by at least 15ms., below the direct sound arrival time. We must reduce the reflection time signature, so it is lower than that of the direct signal. How far below is really determined with what use our room is designated for. Each ms. of reflection delay produces different sounds at our monitoring or listening position.
Image Effects
This time signature delay is responsible for the spaciousness within our recordings. Spaciousness is that great thing where each instrument and vocal has its own place in the mix and that place is correctly portrayed in our sound stage presentation. It is also the region where shifting and spreading of the image occur. Image can shift from left and right and become small and centered staged, similar to a mono recording presentation. Discrete echos can occur at 10 dB over audible threshold parameters and we never want echos at all, anywhere, unless we consciously add them electronically.
Rear Wall Ceiling Reflections
Ceiling reflections coupled with rear wall time delayed, bounce back at the monitoring position can play havoc with our mixes. We do not want another audio signal bouncing off of the rear wall at coming at us at the listening or monitoring position and mixing with the direct pure sound from our speakers. We do not want to have to work around an acoustic anomaly like this and we for sure do not want it in our mix. Ceiling to floor reflections are less noticeable but we do have to treat for them. Lets use our 5 step procedure to treat our room reflections. By following each step, we can make something complicated very simple.
Step 1 – Definition
Step 1 – Define the reflection problem areas. We know that from our discussion, we must minimize reflection time signatures so that they are below that of our direct sound. This time signature ratio must be respected with reflections from side walls, ceiling, floor, and rear wall. We must minimize slap echo from the rear wall and side wall reflections must be treated to avoid image shift and timbre distortions in our sound stages and mixes.
Step 2 – Location
Step 2 – Lets start with the side walls first and figure out what areas we need to treat. We know that lateral reflections from the side walls must be controlled. Start with a position on each side wall at least one foot behind the rear of each speaker, both left and right channel. Move forward with your physical measurement towards the listening position, until you reach one foot behind the listening position. Mark this start and finish area on both side walls. This is the area for room treatment application. To be safe, extend the treatment from one foot off of floor until ceiling side wall intersect.
Step 3 – Treatment Choice
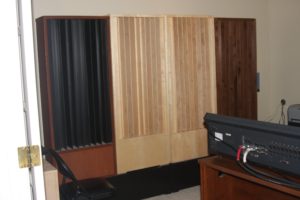
With reflections, we have two choices: diffusion or absorption. Absorption changes the kinetic energy of the reflection to heat and we have sound absorption. Diffusion takes the reflection and reduces its signature by breaking it up into little reflections, if you will. These smaller energy signals are not affected in time or amplitude. Absorption is the recommended treatment for side walls and diffusion works well on front and rear walls. Diffusion requires more physical distance from the sound source to the surface area in order for the diffused waveform to have the space to properly develop.
Step 4 – Installation
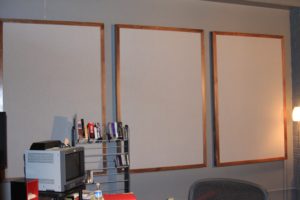
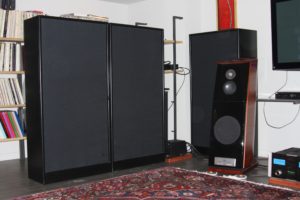
Installing absorption technology on our side walls is relatively easy. If we are using absorptive material that is absorptive on one side only, then we can simply install it per the product’s installation instructions. This usually involves a hook or clip type assembly. If our material is absorptive on both sides, then we will need to keep an air space between the wall and the material. Find your tape marks that you placed on both side walls and then fill in the area with the absorptive material. Be careful in your choice of materials. Not all absorption technologies are equal.
Step 5 – Critical Listening
Spend time listening to your installation. Listen for image location, timbre accuracy, and a general sense of spaciousness. Try adding more absorptive material past the borders you established in step 2. Your boundaries represent the minimal approach, so maybe more will be required for your particular room size, speaker location and listening levels. Listen to all types of music and take your time, this is a process. You will make most of your choices in the first 30 days. After that time period, changes will be minimal. You will know then that you got it right.
Follow The Steps
Reflections from our side walls can impact the image, timbre quality, and spaciousness in our mixes and playback environments. They must be minimized to keep them from interfering with the direct sound from our speakers. By following the steps listed above, you can locate the areas to apply treatment to and install the treatment required. You can also find plans for products you can build yourself at our site at this link: https://www.acousticfields.com/d-i-y-acoustic-treatments/
